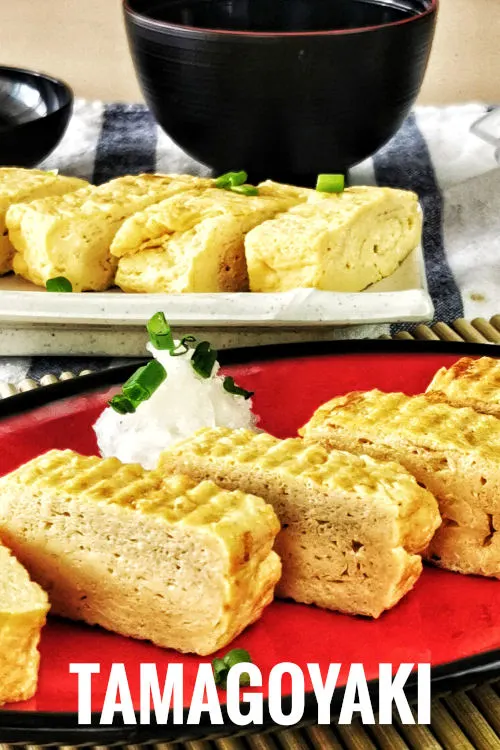
Tamagoyaki (玉子焼き) is a Japanese rolled omelet that folds up like a Swiss roll. It is sweet yet savory, with a custardy, fluffy, and bouncy texture. Its taste is unique due to the use of soy sauce and dashi. I have been eating quite a lot of tamagoyaki in Japanese restaurants and decided to see if I can make a perfect one at home.
Tamagoyaki is ideal for a bento box, sushi topping and is a delightful Japanese home-cooking staple. It is the Japanese name for fried egg. However, it has an alternative name, atsuyaki tamago, which means thick fried egg. As the name implies, it is fried egg thicker than the regular omelet. The thickness is build-up by rolling thin sheets of egg into a layered log.
In this article, I will explain how to make dashimaki tamago (tamagoyaki with dashi). It is a lot softer due to the higher liquid content in the egg mixture and is fluffier, softer, and with more flavor. I will also include some tips for you to make it a success with ease.
Let’s get started.
Note: This post may contain affiliate links. Please read my privacy policy for more info. I may receive commissions for purchases made through links in this post. As an Amazon Associate, I earn from qualifying purchases.

How to make tamagoyaki
It is not difficult to make tamagoyaki, but a few points are crucial to success, and I will list some of the tips below gathered from my experience.
Here are the steps on how to make tamagoyaki.
Preparation
- Crack four eggs in a bowl. Beat the egg with a pair of chopsticks or a fork until the egg white and yolk are thoroughly mixed.
- Add the dashi, and season it with soy sauce, sugar, and a pinch of salt. Mix well.
- Strain the egg mixture through a strainer. This step is optional but will catch the bubbles making the rolled egg fluffier and smoother,
- Heat a tamagoyaki pan on the stovetop over medium heat. Cooking the egg over low heat will make the rolled eggs less fluffy. You can put a few drops of the egg liquid into the pan. It is ready if the egg is cooked nearly immediately,
Fried the egg
- Pour a tablespoon of vegetable oil into the tamagoyaki pan.
- Fold a piece of kitchen paper towel, and wipe away most of the oil in the pan. You need the extra oil soak up with the paper towel in the next step.
- Pour the first quarter of the egg mixture into the pan. Use the tip of the chopsticks to prick and break the large bubbles.
- Skirt around the edge of the semi-set egg with the chopstick to loosen all sites.
- Wait until the egg starts to set at the bottom, but the surface is still in a semi-solid state. Then roll up the egg with the help of a pair of chopsticks while tilting the pan slightly to assist the motion.
- After rolling up the egg like a Swiss roll, apply some oil with the paper towel soaked with oil in the space of the pan.
- Push the egg roll back to the starting point, where it begins. Then apply the oil on the surface of the other side of the pan.
- Continue adding the second quarter of the egg mixture. Then, repeat the step from 6-10 as above. Remember to lift the egg roll and let the egg liquid flow beneath it so that the added layer will stick to the first layer.
- Repeat the same steps for the third and the final quarter of the egg liquid.
- Slide the tamagoyaki onto a sushi bamboo mat. Roll up the tamagoyaki slowly with the mat.
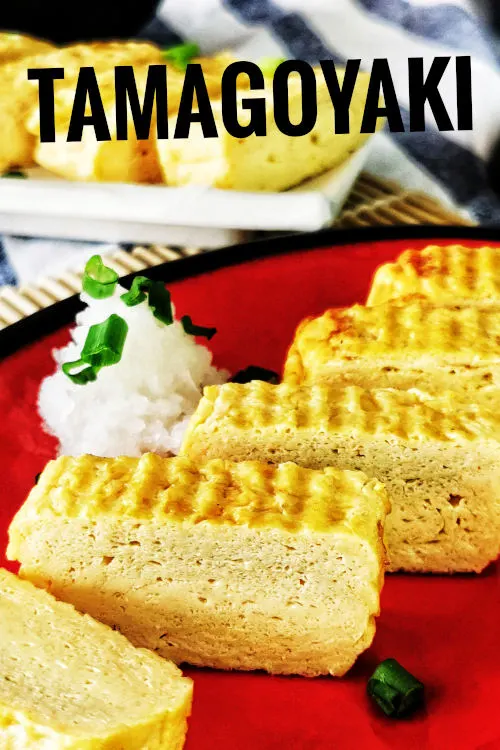
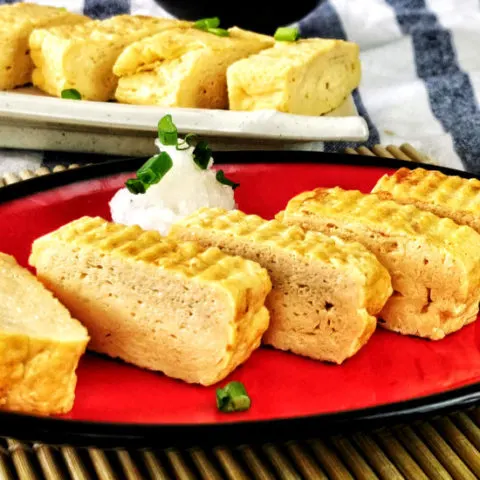
- Let the tamagoyaki rest for five minutes or until it is no longer hot. Then, remove it and cut it into half to one-inch blocks to serve.

Tips on how to make the perfect Japanese rolled omelet
Preparation
- Pour the optimum amount of beaten egg into the pan to form each layer. If it is too little, the surface has dried when the bottom has firmed up, causing the layers not to stick together properly. The layers will be separated after cutting. Use four eggs and divide the egg mixture into four portions for the standard tamagoyaki pan as a general guideline.
- Beat the egg mixture lightly so that it does not create too many bubbles, which will cause some holes in between the layers. However, it is also essential to beat the egg enough so that the egg white and yolk are thoroughly mixed, or else you will find a layer of egg white appearing between the layers.
Frying
- Since the tamagoyaki comprises three to four lawyers, the first and second layers will be the core. Therefore it will not affect much of the final presentation even if they do not fold perfectly. However, be sure that the egg is not fully cooked before rolling up to ensure each layer nicely adheres to each other. Otherwise, they will detach and leave some large gaps and holes in between.
- Keep the heat of the stove at medium throughout the entire cooking process. It is easier to control the heat by lifting the pan than by adjusting the stove. The egg cooks pretty fast, and it is a quick process.
Variation
- You can reduce the amount of sugar if you prefer less sweet compared to the authentic tamagoyaki recipe. You can either use white or brown sugar to make tamagoyaki. I use castor sugar because it is easier to dissolve.
- You may opt not to add soy sauce as it will affect the bright yellow color of tamagoyaki. However, you can reduce the impact by adding a small amount of light soy sauce.
- Dashi is the Japanese stock made by simmering or cold-brewing kombu while stronger versions are added with bonito flakes (katsuobushi). You can refer to the miso soup recipe I have published for details on how to prepare dashi from scratch. You can also use the store-bought dashi powder reconstituted with water as the alternative for simplicity. However, the addition of dashi will make the omelet softer and harder to fold. As a rule, you might want to start with adding 1 tbsp of dashi for every egg. Another way is to add the Japanese dashi soup stock, which will achieve the same result.
- Once you know how to make tamagoyaki, you can add other ingredients to the basic tamagoyaki to switch up its flavor. Some of my suggestions are cheese, scallion, seaweed, cut vegetables, and ham.
Important points
- You need to apply the oil on the surface of the pan before adding the next layer of egg mixture to prevent it from sticking to the pan.
- You may want to use a non-stick pan if you prefer using less oil.
- The freshly made tamagoyaki is too soft to shape. The tamagoyaki store will use a specially made wooden block to press the tamagoyaki against the edge of the square pan to shape it into a long block. While this tool may not be available at home, you can do that either by rolling up with the sushi bamboo mat or a piece of baking paper.
Use a round pan if you do not have a ractangle pan
- If you do not intend to purchase a tamagoyaki pan just for making tamagoyaki, you can do it on the round pan. It will not affect the taste but make it more difficult to shape it perfectly. As a result, both ends of the tamagoyaki are thinner because they are folded less. You can partially solve this problem by folding both sides inverts to create a rectangle shape before rolling the egg forwards. However, it will still not be as perfect as the rectangle pan. Anyway, it does not matter if you are not concerned about its appearance when you just want to enjoy it at home.

How to make tamagoyaki (Japanese rolled omelet) - easy home recipe
Tamagoyaki (玉子焼) is a Japanese rolled omelet that folds up like a Swiss roll. It is sweet yet savory, with a custardy, fluffy, and bouncy texture. Its taste is unique due to the use of soy sauce and dashi. In this recipe, I will explain how to make dashimaki tamago (tamagoyaki with dashi). It is a lot softer due to the higher liquid content in the egg mixture and is fluffier, softer, and with more flavor. I will also include some tips for you to make it a success with ease.
Ingredients
- 4 large eggs
- 4 tbsp dashi (see note)
- 1 tbsp sugar
- 1 tsp light soy sauce
- a pinch of salt
- 1 tbsp vegetable oil for frying
Instructions
Preparation
- Beat the egg with a pair of chopsticks or a fork until the egg white and yolk are thoroughly mixed.
- Add the dashi, and season it with soy sauce, sugar, and a pinch of salt. Mix well.
- Strain the egg mixture through a strainer.
Fried the egg
- Pour a tablespoon of vegetable oil into the pan.
- Fold a piece of kitchen paper towel, and wipe away most of the oil in the pan.
- Pour the first quarter of the egg mixture into the pan. Use the tip of the chopsticks to prick and break the large bubbles.
- When the egg starts to set at the bottom, the surface is still in a semi-solid state. Then roll up the egg with the help of a pair of chopsticks.
- Apply some oil with the paper towel soaked with oil in the space of the pan.
- Push the egg roll back to the starting point, then apply the oil on the surface of the other side of the pan.
- Repeat the same process for the 2nd, 3rd, and 4th quarters of the egg liquid. You need to lift the egg roll and let the egg liquid flow beneath it so that the added layer will stick to the first layer.
- Slide the tamagoyaki onto a sushi bamboo mat.
- Roll up the tamagoyaki slowly with the mat.
- Let the tamagoyaki rest for five minutes, and cut it into half to one-inch blocks to serve.
Notes
You can make the dashi from scratch or use the dashi powder to constitute the stock. There is store-bought dashi powder in sachets. Use one sachet combine with 2 cups of warm water to make the dashi stock.
Recommended Products
As an Amazon Associate and member of other affiliate programs, I earn from qualifying purchases.
-
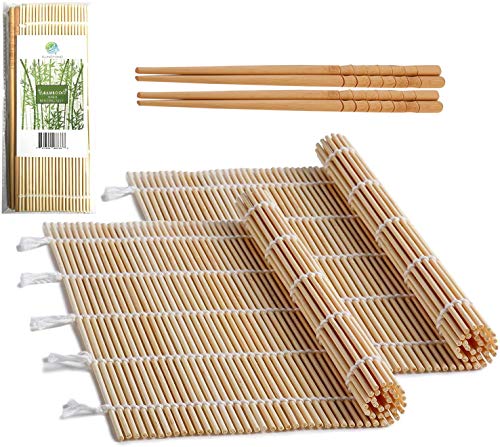 Bamboo Sushi Rolling Mat with 2 Pairs of Chopsticks Natural Bamboo 9.5"x9.5" 2 PCS Sushi Making Kit
 -
 ROCKURWOK Japanese Omelette Pan Nonstick Tamagoyaki Egg Pan, Retangle Small Frying Pan, 7” x 5”, White
 -
 Ajinomoto - Hon Dashi (Soup Stock) 4.23 Oz.
 -

 HuaLan Japanese Natural Wood Chopstick Set Reusable Classic Style Chopsticks 5 Pairs Gift Set
Nutrition Information:
Yield: 6 Serving Size: 1Amount Per Serving: Calories: 78Total Fat: 6gSaturated Fat: 1gTrans Fat: 0gUnsaturated Fat: 4gCholesterol: 124mgSodium: 145mgCarbohydrates: 2gFiber: 0gSugar: 2gProtein: 4g
This data was provided and calculated by Nutritionix on 10/10/2021
Sophia
Monday 15th of November 2021
Good stuff!
KP Kwan
Sunday 10th of October 2021
Hi, this is KP Kwan. I am happy to see you in this comment area, as you have read through my recipe. I am glad to reply to any questions and comments as soon as possible.