Salted eggs never played a vital role in restaurant cooking in the old days. However, now it is all the rage to take Chinese cuisine by storm with the creative interpretation by incorporating its unique taste into various dishes. Salted egg shrimp is one of them.
This salted egg shrimp recipe is typical Malaysian Chinese cuisine. It is one of my favorite dishes to order whenever I dine in a Chinese restaurant.
While making it seems to be a mythical secret, it turns out to be less complicated once I dig deeper into the whole process.
In this article, I will unlock the recipe for preparing a crispy shrimp flavored with salted egg.

Note: This post may contain affiliate links. Please read my privacy policy for more info. I may receive commissions for purchases made through links in this post. As an Amazon Associate, I earn from qualifying purchases.
How to prepare salted egg shrimp
I have divided the making of salted egg shrimp into a few sections. First, the shrimp are washed and prepared as usual and deep-fried. Next, the egg yolks are steamed, mashed, and cook with butter to make a sauce. Lastly, the crispy shrimp is coated with the sauce to serve.
1. Prepare the shrimp for deep-frying
- Remove the heads and shells of the fresh shrimp.
- I prefer to keep the tail to make it more visually attractive.
- Deveined and make a shallow incision at the back of the shrimp.
- Clean the shrimp with water thoroughly, then drain in a colander.
- Pat dry with a dry cloth or paper towel to remove the excess moisture.
- Season with some salt and ground white pepper.
- Set aside for ten minutes before deep-frying.
Note:
- You have the option to remove the shell or keep it intact. The shell helps to hold the salted egg sauce and makes it looks larger and more attractive. It is a favorite way for Chinese restaurants to make salted egg shrimp. On the contrary, shrimp without shells is more convenient to enjoy, which is my preference when I cook at home.

2. Steam and mash the salted egg
- Separate the salted egg white from the yolk.
- Steam the yolks for seven minutes until cooked.
- Using the cleaver’s blade to press against the salted egg yolk is the quickest way to mash the yolk into a paste.
- Keep the salted egg yolk dry while doing this, as we will fry it with butter in the following step.
Note
- Salted duck eggs are sold in most Chinese grocery stores and Asian supermarkets.
- The egg whites are not used in this recipe. Instead, you can use it to steam minced meat, as one of the ingredients for making Chinese spinach soup, or to prepare porridge.
3. Curry leaves and bird’s eye chilies
- The birds’ eye chili is optional. However, it provides bright red dots on the golden egg yolks coating, which make the shrimp eye appealing. There are fresh curry leaves available in Malaysian year round. It is harder to get outside Asia, but it should be available at the Asian grocery store near you.
- Suppose you do not have curry leaves. Instead, use chopped green onions (spring onion) to add some green color to the dish.
Note
- You can use finely diced red bell pepper to substitute the birds’ eye chili to achieve the same effect minus the spiciness.
4. The process of preparing the salted egg shrimp
A. Deep-fry the shrimp twice
- Heat the vegetable in a wok or a large skillet to medium heat.
- Mix two tablespoons of cornstarch with the shrimp to keep them dry just before deep-frying.
- When the oil is heated to 180°F/355°C, place the shrimp into the oil to deep-fry until cooked.
- When the shrimp is cooked, remove it with a slotted spoon and set it aside for a few minutes.
- Return the shrimp to the oil and deep-fry again until golden brown.
- Drain in a colander, then on a paper towel to remove the excess oil.
Note
- Some cooks coat the shrimp with egg white or beaten eggs before adding the cornflour. I use only cornflour as it does not make any noticeable difference to the result without the egg white.
- You can use a kitchen thermometer to check the oil temperature before deep-frying the shrimp. Alternatively, place a bamboo skewer or wooden chopstick into the oil. The temperature is suitable for deep-frying when a constant stream of bubbles rises around the skewer or chopstick.
- Deep-frying the shrimp in small batches helps to reduce the oil required. However, ensure enough oil to submerge the shrimp in the process.
- Double fry the shrimp will make the shrimp crispier.
Alternative method: steamed or pan-fry the shrimp
Some cooks use different ways to cook the shrimp. For example, you can choose to pan-fry or steam the shrimp if deep-frying is not your preferred cooking method. It still tastes good but will not have the crispy texture and the aromatic flavor of the deep-fried shrimp.
B. Make the salted egg yolk sauce
- Heat two tablespoons of butter in the wok over low heat. The butte will burn quickly over high heat.
- Saute the chopped garlic and curry leaves until aromatic.
- Stir-fry the mashed salted egg yolks with the garlic and curry leaves over low heat until slightly thickened and the oil forms bubbles.
- Season with ground white pepper, sugar, and salt.
- Return the shrimp to the wok.
- Reduce the heat to low, and thoroughly coat the shrimp with the thick sauce.
- Add a splash of cooking wine to the shrimp.
- Sprinkle the red chili to garnish.
- Dish out on a serving plate, and it is best to eat with hot steamed rice.
Note
- The temperature should be low-medium while cooking the salted egg yolks.
- I use unsalted butter in this recipe. Reuse the salt if you use salted butter.

5. What is the salted egg?
Salted Eggs are preserved duck eggs soaked in brine, coated with clay and salt, moistened with water, then cured for 15 to 18 days.
The usages of salted eggs are versatile. The yolk’s flavor is buttery, full-bodied, with a rich flavor. It is the perfect ingredient to flavor almost anything, from stir fries to steamed meat and as a sauce.
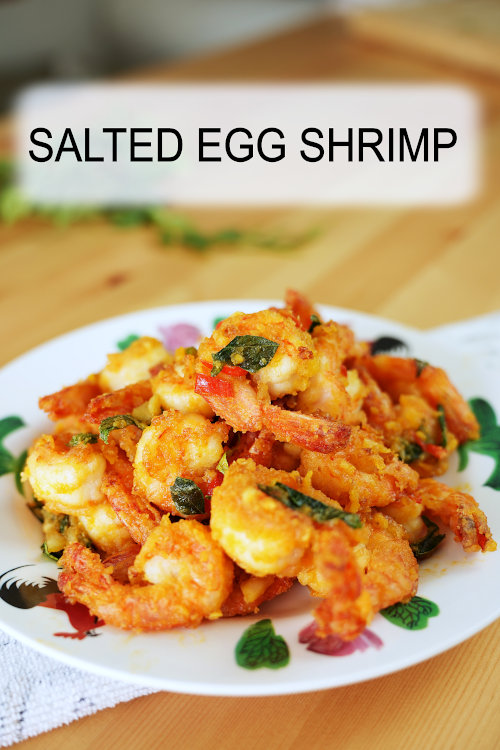
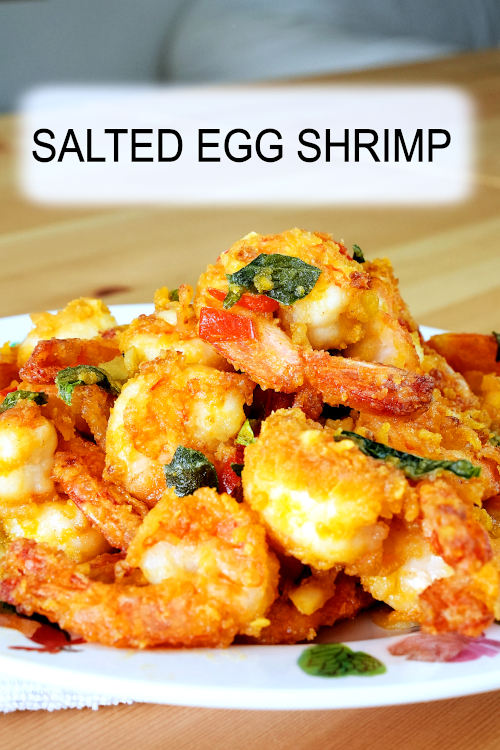
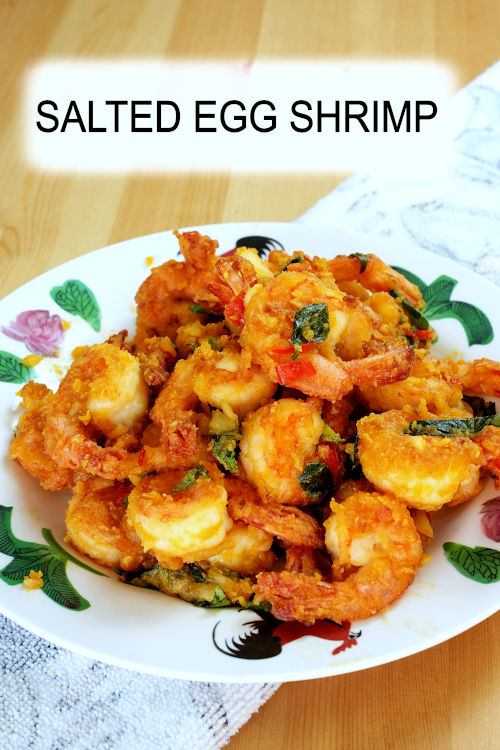
How to make Salted Egg Shrimp
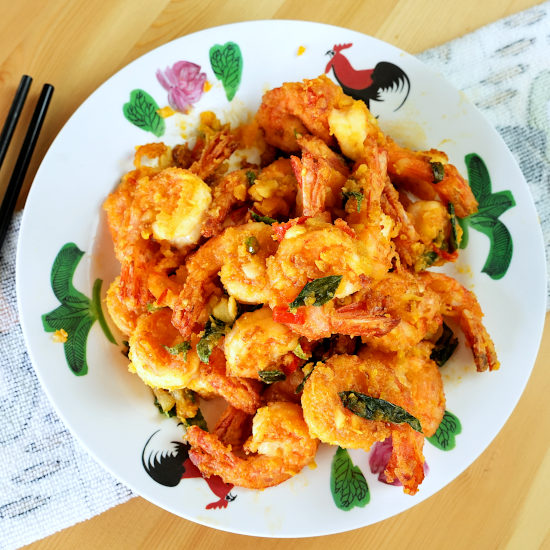

Salted egg shrimp with an incredible flavor. Deep-fried the shrimp twice to make it crispier and coated it with a salted egg butter sauce.
Ingredients
Ingredients (A)
- 500g of prawns (weight after removing the shell)
- 2 tablespoons of cornflour
Ingredients (B)
- 30g of butter
- 2 tbsp of garlic
- 1 red bird’s eye chili
- 2 stalks of curry leaves
- 4 salted egg yolks
- 1 tsp of sugar
- 1 tsp of salt
- 1/4 tsp of ground white pepper
- 1 tbsp cooking wine
Instructions
Preparation:
- Remove the heads and shells of the fresh shrimp, deveined, and pat dry.
- Season with some salt and ground white pepper.
- Set aside for ten minutes before deep-frying.
- Steam the yolks for seven minutes until cooked.
- Mash the yolk into a paste.
Deep-fry the shrimp:
- Heat the vegetable in a wok or a large skillet to medium heat.
- Mix two tablespoons of cornstarch with the shrimp to keep them dry just before deep-frying.
- Place the shrimp into the oil to deep-fry until cooked.
- Remove it with a slotted spoon and set it aside for a few minutes.
- Return the shrimp to the oil and deep-fry again until golden brown.
- Drain in a colander, then on a paper towel to remove the excess oil.
Combine the egg sauce and shrimp
- Saute the chopped garlic and curry leaves until aromatic in butter.
- Stir-fry the mashed salted egg yolks with the garlic and curry leaves over low heat until the oil forms bubbles.
- Season with ground white pepper, sugar, and salt.
- Return the shrimp to the wok.
- Add a splash of cooking wine to the shrimp.
- Sprinkle the red chili to garnish. Serve.
Recommended Products
As an Amazon Associate and member of other affiliate programs, I earn from qualifying purchases.
-

 Habor Digital Kitchen Timer Large, Strong Magnet Back, Loud Alarm, Memory Function 12-Hour Display Clock, Count-Up & Count Down for Cooking Baking Sports Games Office
 -
 Dried Curry Leaves | Aromatic and Distinctive Flavor | With All the Flavor of Fresh Leaves | Kari Patta 1.5 oz.
 -
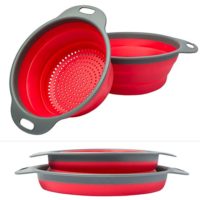
 Colander Set - 2 Collapsible Colanders (Strainers) Set By Comfify - Includes 2 Folding Strainers Sizes 8" - 2 Quart and 9.5" - 3 Quart Red and Grey
 -

 Gold Plum Salted and Cooked Duck Eggs, 8 Piece
Nutrition Information:
Yield:
28Serving Size:
1Amount Per Serving: Calories: 61Total Fat: 3gSaturated Fat: 1gTrans Fat: 0gUnsaturated Fat: 1gCholesterol: 70mgSodium: 677mgCarbohydrates: 2gFiber: 0gSugar: 0gProtein: 6g
This data was provided and calculated by Nutritionix on 7/9/2022
KP Kwan
Wednesday 7th of September 2022
Hi, this is KP Kwan. I am happy to see you in this comment area, as you have read through my recipe. I am glad to reply to any questions and comments as soon as possible.