Imagine the amount of bananas in the banana cake is a quarter of the weight of the cake!
A lot of bananas!
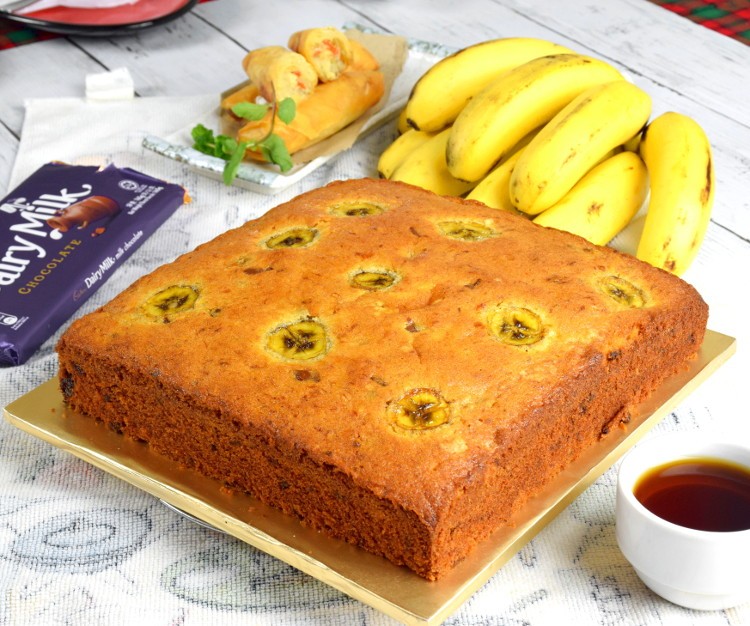
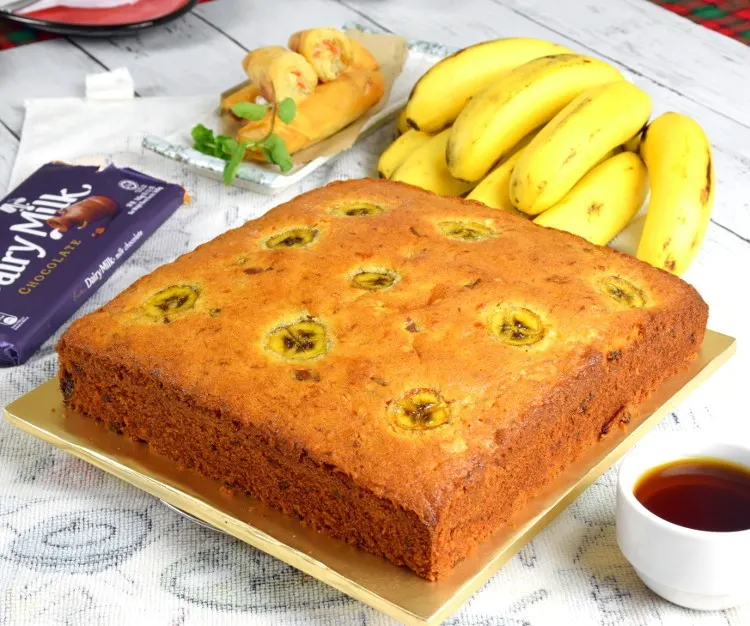
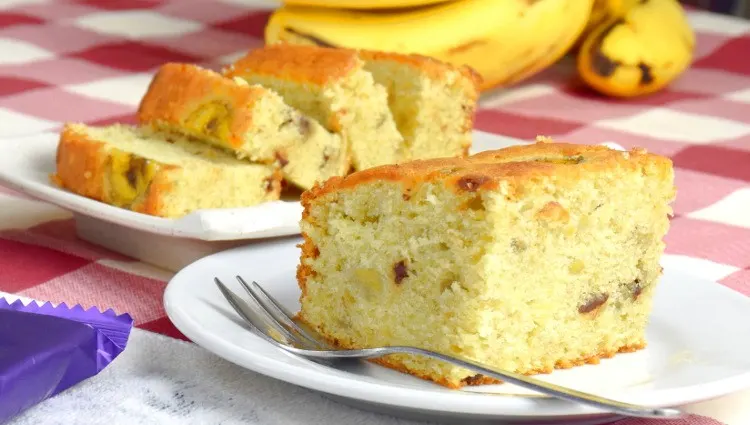
That is precisely how to describe our banana cake, no essence, one hundred percent pure Barangan banana, fully ripe and sweet.
Don’t skip this recipe if you like to eat bananas or love banana bread.
This article is about how to make one of our restaurant’s best cakes- banana cake, endorsed by hundreds of customers. It is the original recipe which has been used for many years in our restaurant.
Nothing is more satisfying when you take a bite when it is fresh from the oven. We can serve you a piece of hot cake, but for my readers who are not in Kuala Lumpur, follow this bare-all recipe post and make it yourself.
Because we want you to enjoy it, just like other customers do
Note: This post may contain affiliate links. Please read my privacy policy for more info. I may receive commissions for purchases made through links in this post. As an Amazon Associate, I earn from qualifying purchases.
Let’s get started.
You will expect this is a basic banana cake recipe. No frill. No lemon juice, sour cream, vanilla extract, butter icing.
Trust me. This is an easy recipe. Nevertheless, we will deal with the techniques to make the cake as detailed as possible.
Part 1 – the ingredients
a. Banana
Choice of banana
Rule number one for making our banana cake is to use fully riped banana for the best banana flavor.
We use a local species called Barangan, widely available in Malaysia and Indonesia. Get any other ripe (make sure it is sweet) banana to make this cake if it is unavailable where you live.
Do not worry if the color of the banana skin turns partially black. It is alright. It only means it is fully ripe. When you touch the individual bananas, you can feel it is soft and about to fall off the stalk. Overripe bananas are sweet, and is best for banana cakes!
Cut and mash the banana.
Once you get the ideal banana for making the cake, remove the skin and mash it with the back of the knife. Reserve some bananas unmashed, and cut into forty thin slices crosswise. Reserve them for decoration.
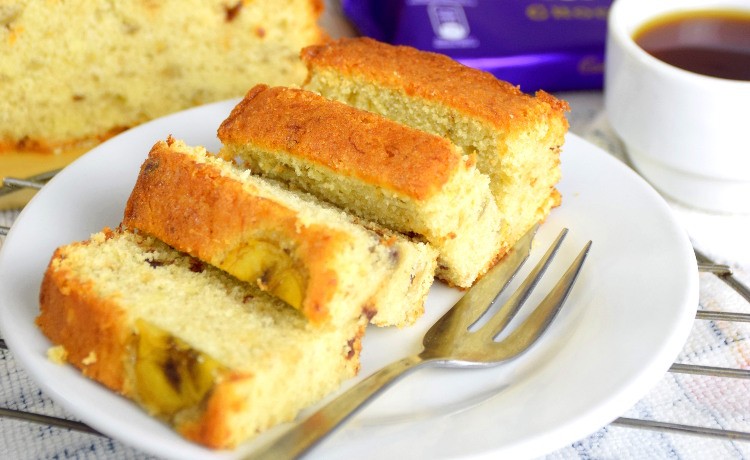
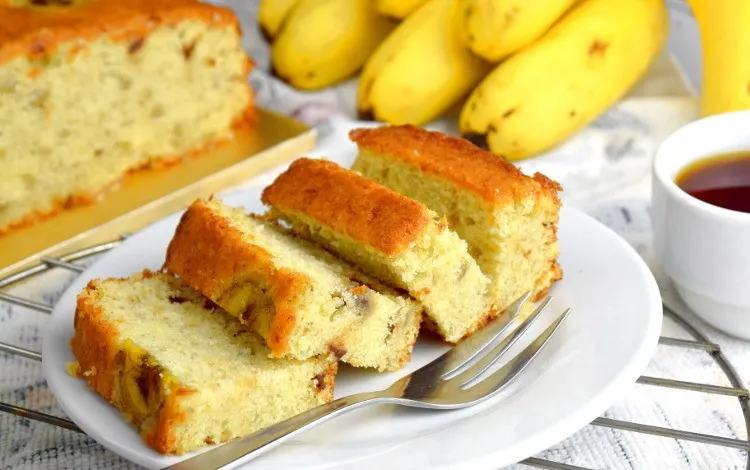
Coarsely chop the mashed bananas. DO NOT blend it as we do NOT want it to become a juice. We want to have some individual pieces of banana embedded in the cake. This step is done with a purpose. You will immediately know there is a real banana, not artificial essence when you bite the cake. Furthermore, the cake will be too wet if we bend the bananas into juice.
Keep the mashed and sliced banana in the refrigerator if you make it in advance. The banana will turn brown quickly once it is oxidized at room temperature.
b. Use the regular cake flour
The regular cake flour is good enough for this recipe. Cake flour contains eight percent of gluten, producing tender and soft cakes. I do not use self-raising flour for a reason. Self-raising flour is a mixture of regular cake flour with baking powder (about 3-4%) and salt (about 0.5%). That means the amount of baking powder and salt is fixed.
Using regular cake flour lets you fully control the amount of baking powder and salt you want to use.
The baking powder for this recipe is 20g per 1kg of flour, and as for salt, it is 10g per 1kg of flour.
Use all-purpose flour if you do not have the specific cake flour with low gluten,
To sieve or not to sieve?
The standard practice of making a cake is to sieve the dry ingredients to remove the impurities and loosen the flour so that it can trap more air in it to produce a lighter texture for the cake.
I do not sieve the flour because I want to go against this general rule. However, thewever, theflour I get from my supplier is spotless and free from lumps. It passes through the sieve in a flash every time. So I started to skip this step to bet that it would work well, and it does.
Sieve the flour if you find that it is lumpy and suspect there are some impurities in it.

c. Is the amount of eggs important?
The size of the eggs does not matter as long as they are fresh. I use the medium size chicken eggs from my supplier, which are about 50g each, excluding the shell. I need about 16 eggs to make a batch of four cakes. (So if you make one cake, four eggs.)
It does not matter if the amount is marginally more or less, as long as it does not deviate too far from the quantity stated in the recipe. So, for, forexample, if I crack 20 eggs and it yields 990g, I will leave it that way and do not bother to crack another egg to add it up.
Perhaps one day I shall try to make cakes with other types of eggs apart from chicken. Yes, how about duck eggs? Has anyone tried that before :)?
d. How to deal with the chocolate
Always use plain chocolate for this recipe. Good quality chocolate indeed is the better choice. However, the quality of chocolate does not affect the final result as much as the quality of the banana.
Keep the block of chocolate in the refrigerator until it hardens. Next, cutxt, cutthe chocolate slices thinly with the knife, followed by cutting it again lengthwise. If you do this when the chocolate is still cold, it will shatter into tiny pieces of chips by itself. Please refer to the video before the recipe below to see how it works.
e. Use the best butter you can get (not a drop of margarine).
The butter banana cake should make only with good quality butter, no margarine. Butter is an integral part of the formulation and cannot be compromised. The flavor is irreplaceable. Our customers repeatedly return because they know we only use the best we can get locally. Some cafes slash the price of their cakes to gain more profits, but they can’t cheat people’s palates. I suggest using unsalted butter as you can control the amount of salt.
f. What type of sugar is ideal for making a banana cake?
We use either castor sugar or granulated sugar for making the banana cake. However, I prefer castor sugar as the granule size is smaller.
The reason is that castor sugar is more refined than granulated sugar and traps more air while mixing with the butter. Therefore, theerefore, thefluffier the cream, the lighter the cake will be eventually.
Use the right amount of sugar.
It is tricky to decide how much sugar is required for the banana cake. There are three factors to consider based on my understanding:
- Use less sugar if the banana is ripe and sweet. This is easiest than done as you depend on your palates to make a subjective decision.
- Use more sugar for a more tender cake, or vice versa.
- Personal (and in case, customers) preference.
Once my customers mentioned that they prefer a less sweet version. So we make a batch of banana cake with less sugar. Unfortunately, they were less fluffy and dense, and the texture was no longer as soft and tender as before. So, after some trial and error, we settle on the formula with 800g of sugar for every 1kg flour. Since then, we have used the 80% sugar rule to formulate all our butter-based cakes, which turn out to be less sweet and still maintain their tenderness.
Our in-house conclusion: 80% of sugar is the minimum amount to produce excellent butter cake.
As we mentioned earlier, the castor sugar I get is more refined than granulated sugar. However, please check with your local bakery supplier to validate this assumption, as this may not apply to different regions.
If you like this recipe, look at our butter cake recipe, green tea chiffon cake recipe, and Japanese cheesecake recipe. There are some important tips out there applicable to the banana cake too.

Part 2: The technique
The following is a detailed explanation of the entire process of how to make the banana cake.
a. Setting up the electric mixer.
Use the wire whisk attachment for the best results. The manufacturer of cake mixers often provides different attachments- the blade attachment (paddle attachment) for mixing pie dough, the bread attachment for kneading bread, and the wire whisk attachment for making cakes.
The wire whisk attachment produces the best result for creaming the butter and sugar.
b. Cut the butter into large pieces.
I used to cut the butter into tiny pieces as it melted quickly. Then I realized that I could let nature take its course. Now the first thing I do is to cut the butter into six to eight pieces. Then I will continue cutting the bananas, measuring the sugar and eggs, etc. By completing all this preparation, the butter had already thoroughly softened and was ready to use.
I do not use melted butter, as I am not sure whether it will produce the same result.
c. The creaming process
Creaming is the critical process in this recipe. Follow these steps to get the best result:
- Put the butter into the mixing bowl. Wait until it is thoroughly softened before mixing.
- Add the castor sugar into the mixing bowl. Soft butter can produce buttercream (i.e., the result of mixing butter with sugar) that is light and fluffy. The effect is easily noticeable by comparing the volume of the buttercream made with semi-hard and fully softened butter.
- Attach the wire whisk to the mixer. Wire whisk attachment yields a better result than the blade attachment. Bread dough attachment is not suitable.
- Start with low speed to avoid splashing. Then increase the the speed to cream the butter and sugar together. Mixing at a higher speed is more efficient in forming light and fluffy cream than low-speed. Low speed produces smaller volume even though mixing for longer than high speed.
What is the endpoint of this mixing process? The best way is to rely on visual observation. The mixture of butter and sugar will slowly turn into cream. During the mixing process, you will notice that the volume will keep increasing, then the cream will become more fluffy and silky. The endpoint is when there are no noticeable changes in appearance, even continuing the mixing process. It is also when it looks like a soft vanilla ice cream. Once you achieve this consistency, the creaming process is completed.
The way I set the endpoint of mixing also means that there is meaningless to mention how long (and at what speed) in the recipe. The quantity, the mixer’s power, the wire whisk’s shape, and the sugar and butter temperature all affect the process. Visual observation is by far the most reliable method, in my opinion.
I also notice that there is hardly any chance of over-mix it. Once I left the mixer running for ten minutes unattended before stopping it, the result was still satisfactory. This means you can buy a little ‘insurance’ by mixing it longer to ensure the best result before moving on to the next step.

d. Add the eggs
Add the eggs to the cream and continue mixing at high speed until homogenous.
Most of the books suggest adding the eggs in batches. I find that this is unnecessary in my case, as my mixer is powerful enough to handle all the eggs. Instead, I pour ALL the eggs into the cream and still produce a silky smooth mixture of eggs, sugar, and butter.
Scrape the sides of the large bowl (and the bottom if you can) with a soft plastic spatula. Some butter and sugar granules will be sticking to the bowl’s surface.
You may want to add the eggs in 3 separate batches if you use a small (less powerful) mixer. Again, the endpoint is when you do not notice any visual difference upon continuous mixing. The result should be a smooth, silky, and homogenous mixture.
e. Add the bananas
After all the high-speed mixing, we need to shift gear to a more gentle motion in the next phase.
Add the banana paste that we prepared earlier to the mixture. Mix at low speed until the banana paste is well distributed. Since we are no longer looking to trap more air into the butter-sugar-egg structure, it is no need to continue mixing it for too long. One minute is all that you need.
f. Add the flour, salt, and baking powder.
Add the salt, baking powder, and flour to the wet ingredients. Mix at low speed until the flour is mixed well with the egg-butter-sugar mixture.
I would say the endpoint for this step is to mix until there is NO visible flour and lumps. Once you get there, STOP. The longer you mix, the more gluten will form and the tougher the cake.
Note: You may need to mix the flour, salt, and baking powder manually. This happens when the lowest speed of the mixer is still too fast, which will produce too much gluten and toughen the cake. A wooden spatula is useful for manual mixing.
Do not overmix the four with the egg-butter-sugar batter.
g. Add the chocolates
I would say this is a chocolate banana cake, to be precise.
Remove the cold chocolate chips from the refrigerator and add them to the cake batter.
Adding the chocolate chips last as prolonged mixing will cause the chips to melt and turn into chocolate syrup.
Since we have left the chocolate in the refrigerator, the chips are still hard enough to withstand the final mixing and are well distributed in the batter.
You can see the individual chocolate chips embedded in the cake when you cut the cake later.
h. Panning and final touch
Line the cake pans with baking paper. Apply some oil to the baking paper and the sides of the baking pan. You may use butter for this purpose or just any cooking oil, which will not affect the flavor of the cake.
Always use a pan with a detachable base or a springboard cake pan. Removing the cake after baking utilizing this type of cake pan is much easier.
Follow these steps:
- Pour the cake batter into the pan. (Mine is an eight inch pan. If you use a round cake pan, I the cake will turn out taller.)
- Smoothen the batter with the spatula.
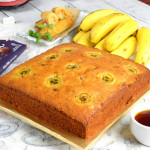
- Arrange the banana pieces that we reserved earlier on the surface for decoration.
- Bake in the preheated oven for sixty minutes with both top and bottom temperatures at 175°C/350°F.
The cake is cooked if you insert a bamboo skewer at the center of the cake, and comes out clean.
Part 3: After baking
a. How to remove the cake from the cake pan.
Let the cake sit on the table for at least five minutes after removing them from the oven. It will start to cool down, and the cake will shrink marginally. Shrinking will loosen the cake from the sides of the mold.
Since the oil in banana cake is relatively high, it will not tightly cling to the sides like chiffon cake when you turn it upended. Instead, placeead, placea cake board on top of the cake and flips it over. The cake will detach from the sides along with the base with the help of a slight push.
Remove the baking paper and stick it to the bottom carefully. Pay attention not to ruin the cake as the banana cake is quite soft. The cake may stick to the paper, and a small piece may tear apart along with the paper. Remove the paper slowly.
Place the second piece of cake board on the bottom of the cake. Flip the cake over again, and be ready to serve.
b. How to store the cake
Here is a great way to the cake if it is only served a few days later, or even after a week.
- Wrap the cake with plastic wrap, two layers.
- Place the cake in a cake box.
- Keep it in the freezer.
- When you want to serve the cake, remove it from the freezer a day in advance. Do not remove the cake from te box so that it return to room temperature naturrally. It will taste almost as good as fresh.
The best easy banana cake recipe- from scratch
Banana Cake

Hundreds of customers endorse this banana cake recipe in our cafe, thoroughly tested. The formula has not been changed for many years.
Ingredients
- 185 g butter (6.5oz)
- 200 g castor sugar (1 cup)
- 200 g eggs, about 4 eggs
- 250 g cake flour (2.6 cups)
- 2.5 g salt (1/2 tsp)
- 6 g baking powder, ,1 1/4 tsp
- 250 g banana flesh, weight without skin (1.3 cups)
- 45 g chocolate (1.5 oz)
Instructions
Preparation
- Attach the wire whisk to the mixer.
- Cut the butter into six to eight pieces. Put the butter into the mixing bowl.
- Remove the skin and mash the banana with the back of the knife. Reserve some bananas unmashed, and cut into forty thin slices crosswise. Reserve them for decoration. Keep the mashed and sliced banana in the refrigerator.
- Cut the chocolate to slices thinly with the knife follow by cutting it again lengthwise. It will shatter into tiny pieces of chips by itself.
- Measure the amount of cake flour, baking powder, and salt.
- Crack the eggs.
Make the cake
- Cream the butter and sugar together at high speed.
- Add the eggs to the mixer and continue mixing at high speed until homogenous.
- Scrape the side of the mixing bowl (and the bottom if you can) with a soft plastic spatula.
- Add the mashed bananas. Mix at low speed.
- Add the flour, salt, and baking powder at low speed until there is NO visible flour and lumps. Once you get there, stop mixing.
- Add the chocolates and mix well.
Panning and final touch
- Line the cake pans with baking paper. Apply some oil to the baking paper and the sides of the baking pan.
- Pour the cake batter into the pan.
- Smoothen the batter with the spatula.
- Arrange the banana pieces that we have reserved earlier on the surface for decoration.
- Bake in the preheated oven for sixty minutes with both top and the bottom temperature at 175°C/350°F.
- Remove the cake from the cake pan.
Notes
The original recipe is for four cakes. I have scaled down to one cake so you may find the amount of some ingredients are with the odd amount.
Recommended Products
As an Amazon Associate and member of other affiliate programs, I earn from qualifying purchases.
-

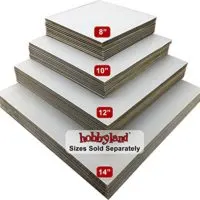 Hobbyland Cake Boards Square White Coated Greaseproof (10" Square, 10 Cake Boards)
 -
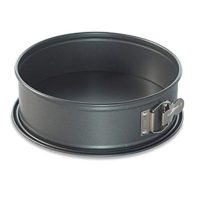
 Nordic Ware Leakproof Springform Pan, 10 Cup, 9 Inch
 -
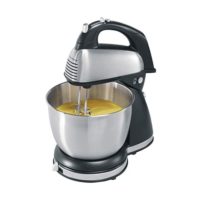
 Hamilton Beach 64650 6-Speed Classic Stand Mixer, Stainless Steel, 4-Quart Bowl and Accessories
 -
 CADBURY Chocolate Candy Bar, Milk Chocolate, 3.5 Ounce (Pack of 14) Perfect for Easter
Nutrition Information:
Yield:
9Serving Size:
9 piecesAmount Per Serving: Calories: 449Total Fat: 23gSaturated Fat: 13gTrans Fat: 1gUnsaturated Fat: 8gCholesterol: 211mgSodium: 376mgCarbohydrates: 54gFiber: 1gSugar: 28gProtein: 9g
This data was provided and calculated by Nutritionnix on 5/22/2019.
Ali
Saturday 23rd of October 2021
Hi KP, I have a smaller cake tin . How would you recommend to cut down the ingredients for a 10x6 inch ? Thanks in advance :)
KP Kwan
Sunday 24th of October 2021
Hi Ali, My cake pan is 8x8= 64, and your is 10x6=60. So I would think you do not need to scale down cause it is about the same size I used in the recipe. Thanks, KP Kwan
Linda Azuar
Wednesday 15th of September 2021
Hi KP,
I have followed your baking advice, and make this recipe like a pro, hehehee. Thanks for taking the time to write every single line as a guideline. I didn't put the chocolate but instead, I used walnut (3tbsp chopped) and some walnut on top.
Quick question, what I didn't get the flat cake surface?
I will keep this recipe forever!
Love, Linda
KP Kwan
Wednesday 15th of September 2021
Hi Linda, I am glad to know that it worked and you enjoyed it. If you get a small dome shape and not flat, it is entirely OK. Normally, the center is raised faster than the sides as it does not cling to the pan and is near the heating element on top. KP Kwan
Sally
Tuesday 22nd of June 2021
Hi KP Kuan,
I normally use baking soda for banana cake as always on my thought was for the texture to rise and soft.
Could you advise me what is the different for using baking soda or baking powder, which of these is better?
If I substitute using all purpose flour 250g, how much should I add for baking soda, or baking powder?
Before was slighty sticky and sometime not fluffy.
I saw your recipe last week and start baking it yesterday by following the steps given and the cake turns out moist and fluffy.
I added chocolate chips instead of block chocolate with walnuts and the choco taste is stronger.
Thank you and take care!
KP Kwan
Tuesday 22nd of June 2021
Hi Sally, 1. Baking soda is more potent than baking powder. If you use 4g of baking powder, 1g of baking soda will roughly have equal leaving powder. 2. However, baking soda works best if there is some acid in the recipe (e.g., lemon juice, orange juice, or anything sour). As for baking powder, there is no such problem. Also, baking powder is more stable, meaning it will still work well if you leave it aside. As for baking soda, you need to use it immediately after mixing with any liquid. Otherwise, the leavening power will depreciate rapidly. 3. In general, use not more than 4g (or less) of baking powder for 100g of all-purpose flour. I hope this information is helpful to you. Regards, KP Kwan
Gary
Thursday 3rd of June 2021
hi the cake turned out very nice. Only shortfall is the crust and the side are too hard. I followed the 175 degC and 60min instruction. I also used an oven thermometer and confirmed that it is indeed 175degC. Should I try to reduce the timing and/or temperature?
KP Kwan
Thursday 3rd of June 2021
Hi Gary, I would suggest reducing the temperature to 170°C and give it a try. KP Kwan
LY
Wednesday 2nd of June 2021
HI KP, may I know this recipe for 1 cake is for what pan size? Thanks
KP Kwan
Thursday 3rd of June 2021
I use 8in by 8in square cake pan.